Pop-up campers can be a great space-saving option for road tripping on a budget. However, due to the nature of the set-up for a pop-up camper, the seams may start to unseal, leaving your camper exposed to water and your belongings in danger of becoming water damaged.
Thankfully, sealing these seams yourself is a relatively simple process.
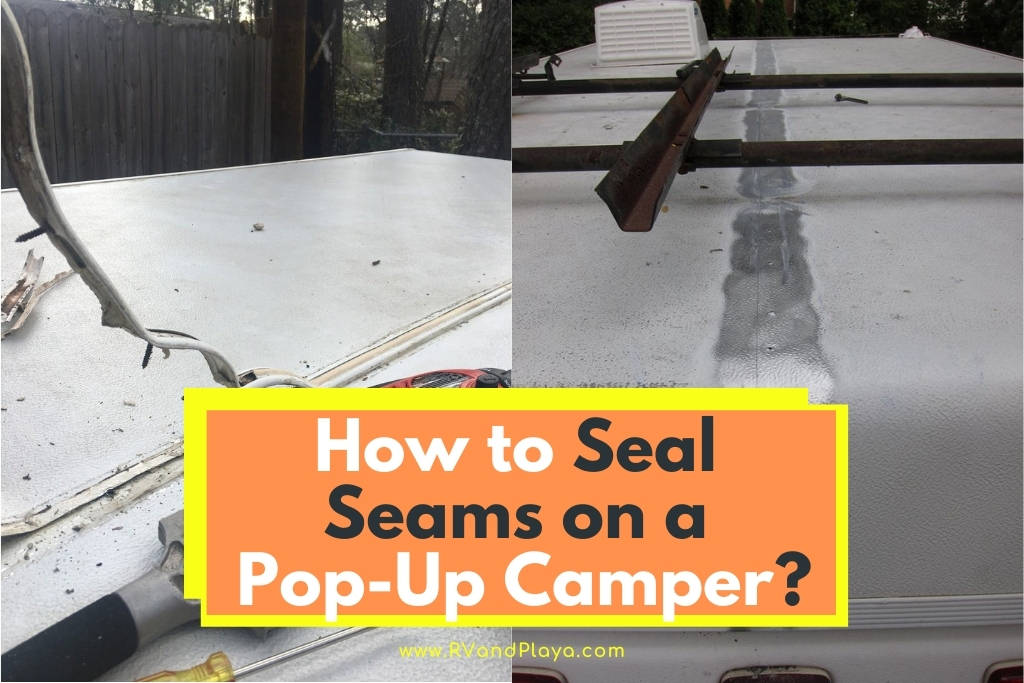
How to seal seams on a pop-up camper? To seal seams on a pop-up camper for canvas, you need to apply a waterproofing solution all over the cloth, then apply seam sealer on all seams inside and out. The process for vinyl is to remove the existing seal and replace it with either a seam sealing tape or caulking.
The process of sealing seams on a pop-up camper is different depending on whether it is a canvas or a vinyl camper.
If you’re dealing with worn seams on your pop-up camper that are just not doing the job anymore, there is no need to worry!
Sealing the seams is a simple process. Read on for more detailed instructions and what to avoid when taking on this project.
Table of Contents
How to Seal the Seams on a Pop-Up Camper
There are a couple of different ways to address faulty seams and ensure that your pop-up camper remains waterproof and functional without breaking the bank.
1. Vinyl Pop-Up Campers
While vinyl may be the pricier pop-up camper option, the price tag comes with several perks that you do not get with canvas pop-ups. Here are some things to keep in mind when handling vinyl:
- When it comes to rain, vinyl is better at deflecting water and drying faster, as well as being less likely to develop mildew buildup than canvas. However, vinyl does retain condensation more than the cloth alternative, so it’s a good idea to keep it ventilated well.
- While vinyl does become stiff in temperatures below freezing, it can resist cracking down to negative 20 degrees Fahrenheit.
- Having repairs done on vinyl campers can get expensive if you are not doing the repairs yourself.
- General vinyl upkeep is pretty simple. Clean it with mild detergent and a sponge or vinyl cleaner with a soft-bristled brush, making sure to avoid a scrub brush as not to cause any cracking or peeling. (source: USA Today)
Sealing the Seams on Your Vinyl Pop-up Camper
The process for sealing the seams for a vinyl pop-up camper is a bit more complicated than that of a canvas camper, but there are a few more options in a material that you can utilize.
Before picking which material to use, it is essential to note that any silicone-based materials will not be suitable to use as a sealant.
Silicone is not a great product to use in this case because if it ever needs to be redone, it is impossible to remove the silicone completely, which leaves an uneven surface that will all leaks to form in the seal.
There are different types of materials you can use from sealants and caulks to special tapes that will ensure a good seal on your camper.
Picking which material you will use will depend mostly on preferences in appearance as well as time availability and difficulty level.
Related: RV Sidewall Delamination – Crucial Guideline & Helpful Facts
Sealing Tape
Using the sealing tape is the easiest and most time-efficient method, but it might not be the most aesthetically pleasing if that is something that could be a concern for you.
To seal your camper seams with sealing tape, follow these steps:
- Remove the existing seal and ensure all remaining glue and debris is cleared off.
- Once the surface is smooth and cleaned with gentle soap, you can begin to reseal it.
- Ensure that the tape is centered on the seam as you lay it down to provide a smoother surface and a better seal so that no water can get through.
- After you lay down the tape, you also have the option to paint over it to match the color of your camper for a more cohesive look.
Sealants and Caulks
Sealants and caulks can add a bit more work to the seam-sealing process. However, there are self-leveling sealants and caulks that can do a great job sealing the seams as well as creating a clean look for the camper.
To seal your camper seams with sealant or caulk, follow these steps:
- Remove the previous seal and any remaining glue and debris that might be left over.
- Once the seam has been cleared and cleaned out, it is recommended that you place strips of blue painters’ tape on either side of the seam to create clean lines. Regular masking tape is not recommended as it can cause peeling of the vinyl.
- If you are using caulk, place a bead of caulking and then smooth it out with your index finger. You can keep a rag nearby to remove the excess caulk and a bowl of water to wet your finger before continuing to ensure smooth, clean lines.
- Once you finish, you can remove the tape from either side of the seam to reveal your finished product.
Making the Roof Watertight by Sealing Seams and Holes >> Check out the video below:
2. Canvas Pop-Up Campers
Canvas is the cheaper option of the two types of pop-up campers, but there are some essential things to know about this material when working with it, such as:
- Canvas materials are treated with waterproofing solutions; however, touching the canvas while it is wet can cause the oils on your skin to compromise the waterproofing.
- While your canvas won’t crack from cold weather, water is likely to get trapped in the material, often leading it to remain wet once packed up, so it does need to be aired out after the trip if it was packed away while still damp.
- Canvas is reasonably simple to keep up as a soft-bristled brush, and some mild detergent is all you need to keep the material clean.
Sealing the Seams on Your Canvas Pop-up Camper
Before you start the resealing process on your canvas pop-up camper, there are a couple of things that you will need:
- Hose
- Mild detergent
- Soft-bristled brush
- Bucket
- Paintbrush
- Waterproofing solution
- Seam sealer
Follow these steps to ensure a proper waterproofing of your canvas pop-up:
- Using the hose, detergent, and soft-bristled brush, wash the canvas of the camper, ensuring you have a clean surface to begin working.
- After the canvas is clean and thoroughly dry, pour the waterproofing solution into a bucket and apply it to the cloth from the top of the camper to the bottom. Let it dry fully.
- After the waterproofing solution is dry, apply a second coat to ensure full coverage. Let it dry.
- Once all the waterproofing solution has dried, apply the seam sealant on all seams on the outside, as well as the inside of the camper.
- Once you have given the seam sealant time to dry, spray the camper down with a hose and check for any leaks inside to ensure you did not miss any spots when waterproofing and sealing your camper.
An important thing to remember when picking out the materials for this process is to avoid using a silicone waterproofing solution as it will cause uneven patches where water can leak through. (Source: Boat U.S.)
Related: How To Repair Travel Trailer Walls [Must-Read]
Conclusion
If you are having issues with leaks in your pop-up camper, resealing your seams is recommended. Luckily, you don’t have to spend hundreds of dollars every time your seam starts to leak when you can take care of it yourself in a few hours.
When doing any DIY project, it is crucial to do some research to ensure you use the right products and methods, but you can quickly achieve a good result as long as you know what kind of camper you have and the proper techniques to care for it.
Recommended Reading
For more helpful articles about RVing please check out our articles below:
Can You Pressure Wash an RV Rubber Roof? [Practical Tips Inside]
Does RV Insurance Cover Water Damage? What You Need To Know
Recent Posts
Lowe's offers seasonal recycling programs for Christmas lights at many locations. This guide explains their current policies and helps you make the most of their recycling services. Remember to...
Goodwill's policy on accepting Christmas lights varies by location and season. This guide helps you determine whether your local store will take your holiday decorations and how to prepare them for...