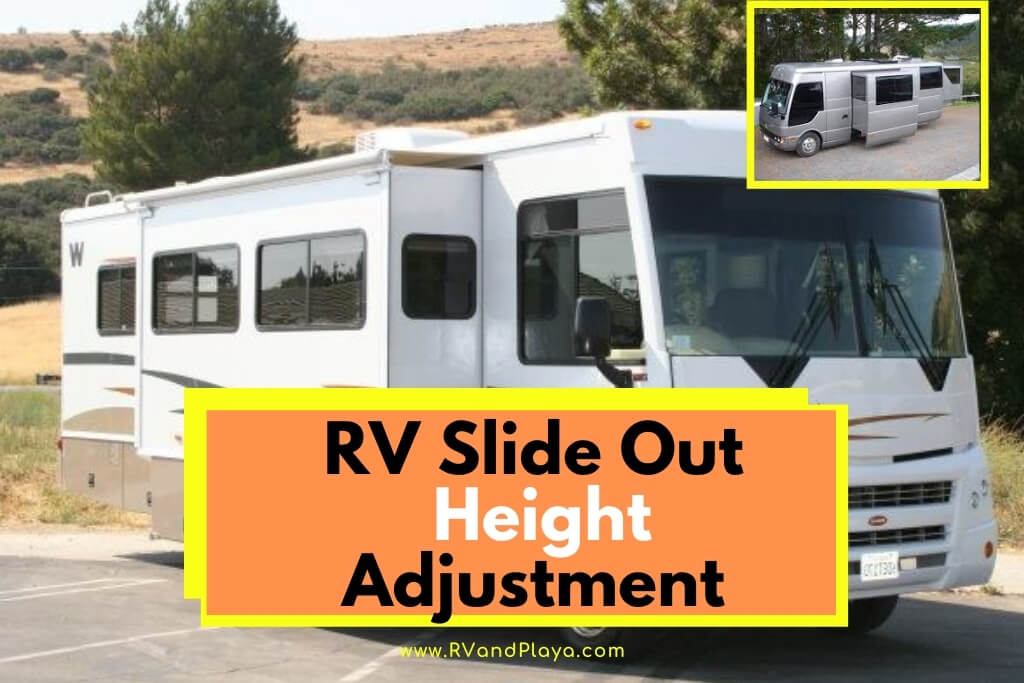
Living or traveling in an RV doesn’t give you a lot of space to play with. However, you can pop an additional room on the side using an RV slide out.
As you know, this tucks away nicely while you’re driving to ensure you’re not involved in any kind of RV accident.
Thankfully, they are pretty easy to use so you don’t have to go on a day course to learn how to make the most out of it.
However, there are some things you need to know — specifically about adjusting the height of your slide out.
But let’s start with the basics, shall we?
Table of Contents
The Basics Of Your RV Slide Out
The Man Behind The Slide Out
Interestingly, the slide outs on RVs have been there since 1990. The genius behind the creation was a man named Mahlon Miller, aka Mr. Power Slide Out Patent.
Today’s technology has meant that companies creating these slide outs have developed the pattern.
For example, some RVs have kitchens that slide out now, not just stark, empty square footage. Quite amazing when you think about it!
You Will Need To Call Ahead
Having a slide out is all well and good but you need to make sure you have called the campground you are visiting before you get there.
Why is that, we hear you ask? Well, depending on the age of the site, they don’t allow for slide outs to be used since it increases the pitch size.
If they are allowed, then you are good to go. However, you always need to check your environment before deploying the slide out.
Ensure you are not going to be hitting anyone or anything. This includes things like power cords, barbecues, and picnic tables.
Hook Up, Then Slide Out
It is best practice to make sure that you connect everything to the sewer, water, and electricity before releasing the slide out.
This is only a suggestion but it is recommended.
Use Your Common Sense. Only Use When Parked!
Okay, this should go without saying but only use the slide out when you are parked. Otherwise, you will cause some pretty major accidents.
Anyway, let’s talk about how to use your RV slide out, shall we? Then we’ll get onto the height adjustment side of things.
How to Use Your RV Slide Out
There are three types of RV slide outs. As you can probably guess, they each have different ways of operating (all of which are simple, so no need to worry about that).
The three kinds are as follows:
- Electric slide out — this type has a motor that allows the slide out to move. All you have to do is push a button or slide a toggle and it magically adds square footage to your RV.
- Hydraulic slide out — funnily enough, a hydraulic pump is used here. Generally, this is only found on the bigger RVs.
- Tip out — this one has a hinge that you have to manually operate to deploy the slide out. However, they are usually only found on older RVs as newer ones favor electric units.
Ideally, you need to keep the mechanisms oiled so that nothing catches when you release the RV slide out.
Either use a dry lube protectant or silicone spray to keep it running smoothly.
It’s a good idea to add this to your regular RV maintenance schedule.
Right, now is a great time to look at the main event — how to adjust the height of your RV slide out.
Are you ready to get into the nitty-gritty details? Excellent, let’s get started!
How to Operate a Slide Out >> Check out the video below:
How to Adjust The Height of Your RV Slide Out
Several companies make the hardware in your RV slide out.
Unfortunately, they tend to have their special mechanisms inside that adjust the height of the addition.
As this is the case, you are always better off checking the manual before you start to tinker around too much.
However, we are going to cover the basics to help you out.
How do I adjust my RV slide out? >> Check out the video below:
Get The Slide Out On Track
Before you do anything else, you need to make sure that your slide out is sat on the tracks properly.
If it isn’t, then it’s a fairly simple thing to fix. Here is how you should go about it:
Step One: Head to the motor. If it isn’t performing as it should, it might be due to an issue in the motor and not the actual tracks.
Step Two: Take the casing door off the motor. Here, you will find wires and bolts (pretty standard).
Step Three: Tighten the bolts. Sometimes it is just a case of tightening the loose bolts. It might be the wiring instead. In which case, re-tighten any loose wire connections.
Step Four: Fill up the lubricant. After you have tightened any loose bolts, just refill the lubricant tank to ensure the rails are slick enough.
If none of this works, you need to check the actual rails and/or cables. You may find debris on the tracks which results in a wonky slide out. Just remove it and resume use!
So, your tracks are clear and your bolts/wires are tightened. You’re now safe to make any other adjustments to the height.
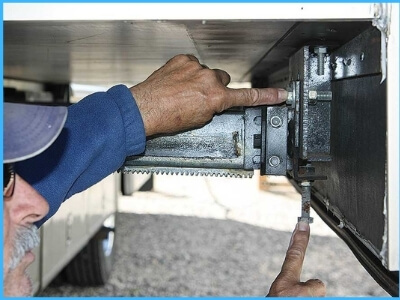
The Slide Out Cables
We’ve already talked about the three main types of slide outs — hydraulic, electric, and tip out (i.e. cable). We’ll focus on adjusting the cables first.
Tip One: Locate the slide’s system sticker. This should have all the instructions printed for you. Everything is (or should be) color-coded so it’s simple to follow along.
Tip Two: Read the sticker carefully. Yep, don’t start until you are well and truly ready to undertake the task.
Tip Three: Mark the current position. Use a permanent marker to denote the position of the nut. Make sure you count your turns when adjusting.
Tip Four: Consider whether you can perform the adjustment yourself.
It might be wise to take your RV into the garage or ask an experienced friend to help you.
Many times, cable systems are complicated and located in awkward places that only experts can handle.
The Slide Out Rollers
We won’t lie to you, this is tricky. Rollers tend to be in very hard to reach places that are not suited for beginners.
Generally, they are located under kitchen cabinets (in the case of kitchen slide outs).
Not to mention that you need to make certain that an adjustment nut is present in the first place.
Tip One: Use a 2 by 6. This will give you the boost necessary to perform the adjustment.
Tip Two: Use a mirror. This allows you to get a good look at the roller and ensure you apply lubricant effectively.
Tip Three: Trim those cabinets. Slicing a thin section from the bottom of your cupboard will give the roller better clearance.
The Hydraulic Slide Outs
If you have a larger RV, you will have probably jumped to this section.
However, the following might be quite disappointing for you.
Unfortunately, the best thing to do when adjusting hydraulic slide outs is to call a professional.
Since there are so many companies making these detailed components, it can be hard to tell you exactly how to do it. So, our advice is to take it straight into the repair shop.
5 Reasons Why Your Slide Out Is Not Working
If your slide out isn’t working, there are 5 common reasons for this. We’ve listed them below for your convenience. But, just bear in mind that if none of these fit your problem, you will need to speak to your local garage.
One: Faulty Motor or Gearbox
For those of you motor-driven slide outs, this is generally the problem. When the motor stops working or runs into a fault, the slide out won’t be able to operate.
Two: Overloaded Motor
Is your slide out showing resistance when opening? If so, the motor will be trying to compensate for this by leeching more power. This might cause the circuit to trip, thus overloading the component.
Three: General Wear and Tear
Over time, excessive friction affects the hydraulic component. It can cause breaks and leaks in the system which stop your slide out from functioning.
Four: Failure With The Valve, Hydraulic Line or Pump
In hydraulic systems, a pump generally sets off the rams and actuators. Therefore, if that fails, your slide out mechanism will fail too.
Five: Scarred Drive Pins
Gear systems have drive pins. If yours are under too much strain, then it’s likely that shearing forces are present which scars the drive pins.
How Much Does It Cost to Fix A Slide Out On an RV Or A Camper
How much does it cost to fix a slide out on an RV or Camper? Generally, the cost ranges from $4,000 to $20,000 if you are looking to replace the entire slide out. Not to mention that the labor usually comes at an extra cost too! However, repair cost depends on the size of your camper van.
If you don’t have to replace the entire slide out, there are ways you can save money.
We suggest that you take a look at the problem yourself to begin with. Check for debris on the tracks of your slide out if it isn’t running as smoothly as possible.
Simply remove anything you find and see how that goes. If there is still something wrong, you check the motor, gearbox, or hydraulic system.
You will likelyhave to get a professional RV mechanic to fix it though. This will cost you a fair amount, but it is decidedly cheaper than replacing the entire unit.
How Does A Schwintek Slide Work?
Schwintek slide outs are the most commonly seen partitions on RVs these days (although there are others). They make use of something called worm gear.
This allows the partition to actually slide. To operate it, a very simple control panel, located inside the RV, is used.
The patented worm gear has motors on either side of the slide out partition. These are how the unit moves in and out as requested.
You will find that they are far easier to use than other types of RV slide out systems available. You could say that they have revolutionized this area of the RV world!
How Do You Reset A Schwintek Slide?
At some point, you will more than likely have to reset your Schwintek slide out. Don’t stress, it’s really easy to do. You’ll know that it is time to do so when an error code displays on the control panel mounted on the interior wall of your RV.
Here’s how to reset your Schwintek slide out:
- Extend the slide room fully using the switch on the control panel inside your RV.
- Make sure you keep hold of the switch until both motors have shut down by themselves.
- Bring the room in 1 to 2 inches using the same control panel.
- Repeat the previous three steps until both of the motors switch off simultaneously. Usually, this takes around 3 tries before the system is properly re-synced.
- Extend the room fully again.
- Retract the room fully.
- Ensure the motors shut down automatically before you release the switch.
Should RV Slides Be Lubricated?
Should RV slides be lubricated? In short, yes! RV slides should absolutely be lubricated. Some people claim that it isn’t necessary but proper maintenance requirements state that lubrication is needed to ensure proper operation.
Specifically, slide outs need two different types of lubrication.
The tracks and sliding mechanism need to be lubricated with a dry type. You don’t want the tracks to attract dirt and dust so a dry lubricant will ensure this doesn’t happen.
Not to mention that it stops rust from coating the delicate mechanisms in your slide out.
The rubber sealing gaskets and wipers need regular lubrication too. As you have probably gathered, you need a rubber lubricant for this part of your slide out.
You should aim to do this every two months, as well as when you are getting your RV ready for spring. It just ensures the rubber stays flexible.
Both types are super easy to find in most hardware stores so this shouldn’t be a problem.
Top 3 Best Lubricants for RV Slides
In our humble opinion, the top 3 best lubricants for your RV slides are as follows:
#1. Camco 41105 RV Slide Out Lubricant
You probably know the brand, it’s super popular among RV owners. They have a fantastic reputation for offering the best of the best products.
This lubricant is seriously effective at getting rid of that horrible squeaking sound that the slides can develop over time. Although, it does far more than that like:
- protecting from rust and corrosion.
- works with gears, rollers, repair tools, and chains,
- and lots more.
#2. 3-In-One RVcare Slide Out Silicone Lubricant
Not only does this one lubricate your slide out, but it also waterproofs! This will ensure you won’t have to deal with annoying squeaking and it prolongs the lifespan of your rig by a considerable amount.
#3. Thetford 32777 Premium RV Slide Out Lubricant
This one can help with your car or boat too! Its versatility is useful since you can use it around your whole RV for doors, windows, and other places prone to squeaking or rusting.
Will My Slide Out Work Without A Battery?
Will my slide out work without battery? Yes, It is possible to use your slide mechanism if the battery is flat. You can pick from one of the following three ways:
- Connect your RV to shore power. This will allow you to operate the slide mechanism.
- Connect your generator to use the slide out partition.
- Start your truck and use the power generated from the engine to operate the slide mechanism.
Depending on the age of your camper, you might be able to manually operate it. If this is the case you can use a T-assist handle to do so. You do need to put some weight behind it but it’s fairly easy!
Can You Level RV With Slides Out?
Can you level RV with slides out? No, I do not recommend it. The general rule is that you should always level your RV before deploying the slide out.
Why? Because it puts far too much pressure on your camper’s leveling jacks. Plus, it will only enhance the wear and tear process, causing you to spend way too much money, way too quickly.
Aside from all of this, it just easier for your slide outs to deploy when the RV is leveled. You’re more likely to damage the retracting mechanism if it isn’t leveled beforehand.
The Bottom Line
Adjusting the height of your RV slide out system isn’t going to be the easiest thing you do all year.
However, it can be done. Although, be prepared to seek professional help if you aren’t 100% confident with the task at hand.
References:
https://blog.campingworld.com/rv-basics
https://liferebooted.net/2018-phaeton-40ih/Schwintek-Slide-Owners-Manual.pdf
Recent Posts
Lowe's offers seasonal recycling programs for Christmas lights at many locations. This guide explains their current policies and helps you make the most of their recycling services. Remember to...
Goodwill's policy on accepting Christmas lights varies by location and season. This guide helps you determine whether your local store will take your holiday decorations and how to prepare them for...