We all know that continued condensation collection in our travel trailer can lead to a big list of problems down the road. It is even a hassle at the present moment. Stopping condensation before it starts is essential to your health, peace of mind, and trade-in value, should you ever decide to upgrade your rig. Don’t worry, though! There is plenty that you can do to protect yourself from condensation.
Fifteen effective ways to stop condensation in travel trailers or RV are:
- Watch the weather.
- Use your roof vent to suck out moisture.
- Keep air circulating.
- Check HVAC vents regularly.
- Replace trim and seals every few years.
- Cover windows during the day.
- Cook with proper ventilation and circulation.
- Shower for short periods.
- Use a dehumidifier.
- Use moisture absorbing products.
- Wrap your pipes and check the plumbing for leaks.
- Avoid parking near bodies of water and humid areas.
- Dry the trailer thoroughly after washing it.
- Shut windows and doors during rain.
- Store your trailer correctly.
You can combine several of these helpful hints for the best results. Read on to find out more about each of these fantastic ways to help reduce condensation in travel trailers.
Table of Contents
15 Ways to Reduce Condensation in Travel Trailers or RV
Condensation happens when cold air hits a warm surface, and the change happens so rapidly that the moisture from the cold air evaporates on the warm surface and causes condensation to form. The same goes for warm air when it hits a cold surface, such as a hot summer breeze blowing into your cold air-conditioned travel trailer in the middle of summer.
Because of condensation, cool surfaces such as countertops and windows develop a thin layer of dew across them. That’s why the ground outside often has a layer of dew on it in the morning. The cold air from the night chills the ground, and the warm, humid morning sun heats it quickly enough for condensation to form.
STOP CONDENSATION TIPS Camper Van >> Check out the video below
Watch the Weather
As campers, the forecast is one thing that we keep our eye on daily. Fluctuation in temperatures and levels of humidity in the air can have a direct effect on every step of the camping experience.
Not only are we watching the weather during the camping season, but we also want to watch it during the offseason. Precipitation and even high percentages of humidity in the air can be bad news for our travel trailers.
Moisture from rain or a hot, muggy day can bring condensation into our trailers. Where there is condensation accumulation, there can be future problems. Condensation is water, and if we allow water to accumulate and lay on the surfaces of our trailer, we face problems like mold, rotting, and rust. Take extra precautions during inclement weather, just to be safe.
Use Your Roof Vent to Suck Out Moisture
Roof vents are a feature in our travel trailers that we should not take for granted. They are installed with condensation control as a top priority. You can use your roof vent to allow hot, humid air to escape while cooking, showering, or any other activity that might cause condensation to start accumulating. Turn on the fan setting (if you have one) for the best results.
Checking the seals around your roof vent as part of your exterior seal check maintenance is essential, too. You should check your seals each spring. The vent is sealed with silicone or caulk that can dry out or crack over time. Catching small cracks in sealants prevents possible leaks after a hard rain or even a trip to the car wash.
Keep Air Circulating
Stagnant air in small spaces is never a good thing. The amount of moisture in the air is enough to create condensation on surfaces. Factors like cooking, showering, and even breathing can have an effect on moisture in the air, also.
Circulating the air can help move the moisture, and should be paired with an open door or window so that the moisture has somewhere to escape to.
Cross ventilation can work wonders, too, especially in a small space such as a travel trailer. That is precisely why most of the travel trailers on the market are manufactured with windows on either side. Even if they are small, they can still be of great assistance to resisting condensation.
Related reading: The Smallest and Biggest RVs You Can Rent (2020 Updated)
Check HVAC Vents Regularly
Part of your monthly chore list should be checking your HVAC vents. Responsible travel trailer owners know how vital that chore list is. The chances are that all is well, and you can check it off of your list until next month.
However, if the vents are clogged or dirty, take the time to clean the entire area thoroughly. After it is clean, any filters should be washed or replaced, as well. The vents are helping you to keep the air clean, so it is crucial to keep the dust build-up maintained.
Dirty filters and vents mean that moisture in the air can not be adequately filtered, and you will see the proof of that in the form of condensation. HVAC vent maintenance is a big part of stopping condensation.
Replace Trim and Seals Every Few Years
Your trailer has a ton of seals, which you probably are already aware of. There are seals all around the windows, the door, and in every corner and crack. These seals are made to last years and years, but they will eventually wear out and need to be replaced. Extreme weather or body damage from an accident can cause your seals to need to be replaced before the warranty is up.
Not everyone is up for the challenge of resealing their rig. Most of us would rather hire someone to do the job. Work done by a professional comes with a guarantee. It’s difficult to guarantee our own work on a job that serious.
Resealing the roof is something that should be done annually. All other seals should be checked (and repaired) at the same time. Be prepared to be without your rig for a day or two. Drying and curing do take a while. This project is best done just before the season starts or when it is coming to an end. That way, you won’t have to sacrifice your precious camping time.
Cover Windows During the Day
While some travel trailers come equipped with fitted window blinds, or decor matching curtains, others do not. Picking out the right window treatments could mean a lot in your efforts to win the continuous battle against condensation. If interior decor is important to you, you may want to take your time shopping for the right color, texture, and style of window covering.
Related reading: The 8 Travel Trailers with the Most Windows
Whether you choose blinds, curtains, or something in between, make sure that the material is thick enough to reflect the sun and discourage moisture collection. All cotton blackout curtains in any color work well.
Replacing Windows
Professionals might suggest that you replace your travel trailer’s windows to fight off condensation build-up. Unfortunately, RV manufacturers do not always put a lot of focus into the quality of the windows that they install in the units coming off of the production line.
The windows may function well enough to protect you and your rig from wind, debris, and unwanted critters coming in. However, the average travel trailer stock windows are single-pane glass. Acrylic windows are thought by consumers to be more effective at preventing condensation from ruining their lives.
It is not a minor job to replace the windows in your trailer, but it will be well worth the effort in keeping your trailer condensation free. It is not recommended that you attempt to remove your trailer’s windows and replace them with updated ones. This is a job best left to the professionals.
Cook with Proper Ventilation and Circulation
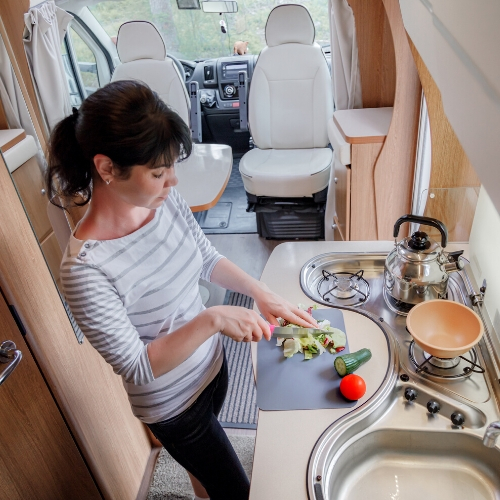
Having the comfort of a home-cooked meal while we are traveling or camping is something we all can appreciate. But the build-up of condensation coming from boiling water or any kind of steam from the stovetop can be detrimental to your travel trailer.
Opening a window or the door can help let out some of that hot, humid air, not to mention any lingering smells. Even if it is only for a short amount of time, it will still make a noticeable difference.
When you are cooking inside of your travel trailer, opening your roof vent and turning on the exhaust fan will draw out rising heat and moisture before it has a chance to saturate your ceiling.
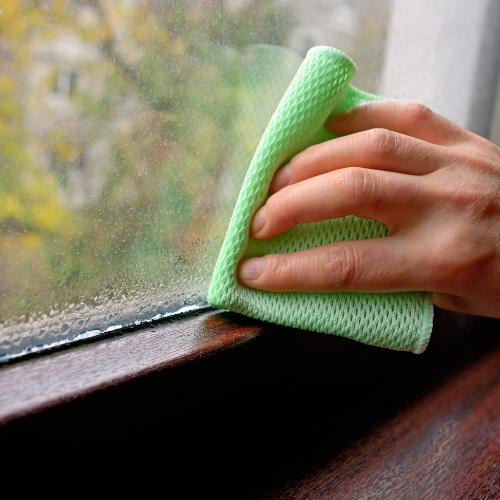
Do you see droplets on your windows, walls, or ceiling? If you haven’t adequately vented the space while cooking, you may see the condensation start to form. Take a dry towel, and blot or wipe the surfaces where you see condensation. Then, air the room out as much as possible.

Cooking Outside
Battling indoor condensation in a travel trailer may be as simple as cooking outdoors instead of using the kitchen inside. When the weather is right, cooking outside can be fun, and an adventure all on its own.
Grilling, using a camping stove, or cooking on an open fire just brings a little something extra to the entire camping experience.
Taking your meal prep outdoors means saving your travel trailer from the heat and condensation that cooking indoors can bring. With such a small space, the water evaporating from your food has nowhere to go but all the places that you don’t want it to go.
Shower for Short Periods
A foggy bathroom mirror is an excellent way to tell that there is too much moisture in the air after your shower. The not-so-easy way to tell is the sneaky mold that may be forming on the ceiling and walls from the excess moisture.
Showering in the comfort of your own space is a luxury. Venting the area and circulating the air will give the moisture somewhere to escape. Keep your showers as short as possible.
Using a public shower may not be your ideal way to spend a Saturday morning. But, when you are trying to keep the condensation down in your travel trailer, a hot steamy shower is a sure-fire way to bring on enormous amounts of condensation.
Grab your toiletries, shower shoes, and towel and take advantage of the hot shower provided by the facility such as your campground or gym. Which is worse? The shower at the campground, or mildew in your home on wheels? Let your hot shower last just a minute longer, knowing that you are doing all that you can to preserve the quality of your travel trailer.
Use a Dehumidifier
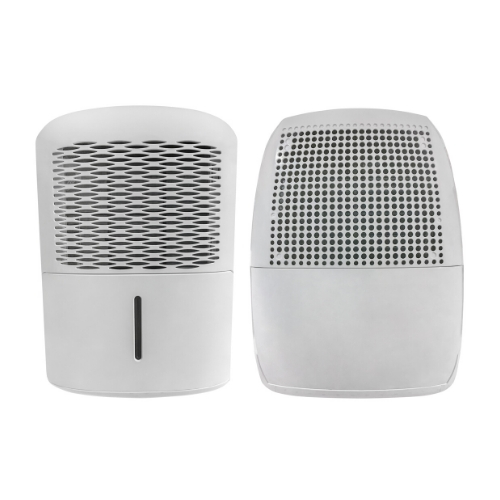
A dehumidifier can be one of the best defenses against condensation. The only challenge is finding space for it, as most travel trailers are not the biggest rigs ever built. Lucky for us, there have been advancements in the size of the dehumidifiers on the market. They aren’t as big and bulky as they used to be.
You can even get a portable or miniature model if you are worried about it taking up too much of your precious area. Every inch counts in a tiny home.
A small unit should be plenty powerful enough to dehumidify your space. The only complaint you might end up having is that you have to empty the reservoir more often than you would have to on a larger unit, but it shouldn’t be a huge issue.

Once you have it up and running, you will notice an immediate difference in the amount of moisture in the air, which can be extra helpful for rainy days and humid climates.
Dehumidifiers are great to have in a travel trailer and are relatively low maintenance. Check the reservoir once a day. It is recommended to empty the reservoir before storing or driving your travel trailer. Empty it when it is full, and wash the reservoir once a week to remove any dirt or build-up from the water collected.
The only other thing that you have to do is change the filter. Each unit will have different filter maintenance requirements. Some may not even have a filter while others have filters that can be rinsed with water, instead of replacing.
Related reading: Can You Use a Humidifier in an RV and How to Control It?
Use Moisture Absorbing Products
There is a surprisingly large amount of products on the market that are designed to suck moisture out of the air, from small sachets to large gallon-sized buckets. These are a must-have and a staple in most campers. Shop around, and take a look at the different options out there to see what works best for you and your travel trailer. You may decide to use a combination of different products together.
Popular styles of dehumidifying products are the sachet or bag types. Some have charcoal or cedar chips inside, which is excellent for absorbing moisture. The bags are great for hanging in the bathroom or near the kitchen. They are also perfect for the clothing wardrobe.
Sachets are smaller, so they fit well in areas like drawers or cabinets. You can find scented options if you want something light like lavender or something more fierce like rosemary. Of course, the hypoallergenic choice would be to go with the unscented sachets.
A more industrial approach to dehumidifying products would be to go for the plastic bucket type, usually filled with tiny moisture-absorbing beads that plump up when they are full. Whichever style you choose, you will get the added benefit of odor absorption, as well. What’s not to like about that?
Wrap Your Pipes and Check the Plumbing for Leaks
A simple peek at your plumbing every once in a while could prevent condensation that can cause mold and other costly damage from forming in your travel trailer. It would be a shame if neglecting to check your plumbing connections, hoses, and pipes led to major problems.
If there is a leak or build-up of any kind around the pipes, joints, or hardware, do not delay in calling your repair shop to schedule an appointment. In addition to leaks of any kind, checking for pipe insulation is essential to help fight off condensation. Wrapping your pipes is a quick, affordable, and simple solution to the problem at hand.
Pipe insulation usually comes on a roll. You can measure it out and cut it to the size that you need. Insulating your pipes will prevent the heat from the hot water running through them from causing condensation to form any faster.
Proper winterizing of your plumbing can prevent nasty problems that happen when your rig is in storage for the off-season. Spending the extra time (or money to have someone else do it) will be something you were glad you did. Remember, every little bit helps.
Related reading: How to Prevent Travel Trailer or RV Pipes from Freezing?
Avoid Parking Near Bodies of Water and Humid Areas
As you know, choosing your parking spot wisely has a significant effect on your entire camping experience. Get yourself into the wrong parking spot, and you will wish that you had spent more time choosing your spot. You have to get just the right one.
Which would be better for the sake of saving yourself (and your travel trailer) from an attack of condensation? Camping in the desert, or camping next to a river in the rain? Exactly.
You can’t always predict the weather or control where you are camping. However, you can do your best to be informed and be aware of the conditions around you and what measures you can take to prevent moisture from wreaking havoc in your trailer.
If you can, stay away from bodies of water and direct sunlight. If it is a hot day, and your air conditioner is running, parking in the direct sunlight will cause condensation to form on your windows and interior surfaces.
Remember that humidity equals condensation. So, if it is going to be humid out, take extra precautions. Crank up the dehumidifier to full blast, turn on the exhaust fan, and break out a few more of your moisture absorption bags! You’ve got this.
Dry the Trailer Thoroughly After Washing
Washing your trailer can be a rewarding way to spend an afternoon. Oh, how it shines when it’s clean! That’s when you are the proudest to own a travel trailer. As thorough as you are with the sponge and bucket of soapy water, you should be with the dry towels. Grab a stack of dry soft towels; microfiber towels work best.
You may need a ladder to get to the top. Drying your trailer from top to bottom is essential for conquering condensation. Take a trip around the block to get the water off of the roof, and to let your rig air dry a bit.
When you get back from your air drying trip, park in the sun, and open the door to let the interior temperature of the trailer warm up to the temperature outside while you finish drying and buffing.

Water outside has a sneaky way of finding its way in. Plus, washing your vehicle quickly changes the temperature. So, a trip to the car wash is the perfect time to be on high alert for condensation. When the cold water hits the hot surface of the trailer, condensation can form on the windows and even the walls.
If there is any rotten trim or cracks around the windows, you will be able to tell by condensation forming on the inside of your trailer’s windows. Newer trailers do not have too many issues with this, but the older ones do.
Before you even start spraying the trailer down, double-check your roof vent and all of your windows and door to make sure that they are completely closed. Neglecting to do this will give you worse problems than a bit of condensation, you’ll have a pond in the middle of your trailer.
Shut Windows and Doors During Rain
When we are camping, we are typically vulnerable to the elements of nature. Rain is one great example of how nature can directly affect your travel trailer. We are all guilty of forgetting to shut the roof vent or a window in our trailer, and after we leave, it starts to rain. We must be more mindful of it if we are going to win the battle against condensation.
Water is our friend; we need water to live. We just don’t need it inside our trailer because we forgot to shut the window. Even when you are home, and it starts to rain, double-check that your windows and door are securely closed. Some suggest leaving one window slightly cracked to allow moisture to escape.
Catching Condensation
Getting ahead of condensation means that you will be avoiding major headaches in the future. Do you have any idea what condensation can do to a travel trailer? Besides building up on your windows, and making weird streaks on the glass, it can also down the side of the exterior of your rig and leave unsightly dark trails.
There is not much that you can do about condensation on the outside of your trailer, short of moving to the desert. People that live in the desert do not have this problem very often.
They have an entirely different set of issues that they have to deal with, but not condensation. Humidity doesn’t exist in the desert, and precipitation is rare. So, moisture just isn’t present, and, as a result, there is no condensation.
Storing Your Trailer Correctly
Just as necessary as maintenance during camping season is upkeep while your rig is in storage. If you can, choose an indoor climate-controlled storage facility for seasonal storage. If you have a more basic storage spot, like your backyard, frequent trailer checks should be done.
Once a month or so, open the door and have a look around to make sure that everything is as it should be. Make sure that your winterizing is holding up as it should.
If you have to store your rig out in the open for the off-season, at least make sure that it is covered. Off-season usually means cold winter. And cold winter could mean snow or freezing temperatures, neither of which is suitable for a travel trailer.
Covers come in all different prices and weights. Shop around online, or call your trailer sales office. They may have them in stock. Once your rig is fully covered, be sure to secure the cover tightly. Another way you can protect your rig in the winter is stock up on moisture absorbers. Place extra absorber buckets or bags around your rig to fight condensation for you.
In Conclusion
With all of this helpful advice, hopefully, you are well on your way to guarding your travel trailer against condensation and the problems that come along with it. There is no one single way to keep out the condensation. However, together, these methods are your key to condensation-free travel trailer living.
Travel trailers are an expensive, albeit rewarding, investment in adventure, so make sure to take these tips to keep your rig in the best shape possible!
You might want to check out our other articles about Travel Trailer for more information:
How to Prevent Travel Trailer Theft – 13 Steps that Work
4 Essential Reasons Travel Trailers Have Batteries [Must-read]
Setting Up a Travel Trailer to Live In: 20 Essential Steps
Does your Travel Trailer need a Sway Bar? A Simple Guide
Recent Posts
Is Toyota Remote Connect Free? (Subscription, Services Plans)
Does Toyota Remote Connect have an included trial? It used to be the case that, when you bought a new car, you made one straightforward payment and that was it. Now, it feels like there are...
Toyota Safety Connect: What It Is And Why You Need It? Whether you’re buying a new Toyota or you’ve had one for a while you will have been given the hard sell on their Connected Services but do...

